Running an online radio station means constantly looking for innovative ways to create new content and attract more listeners. Streaming your radio on YouTube live is a great way to achieve those goals, whilst building a community on one of the world’s most popular platforms. In this article we’ll explain how to broadcast your station live on YouTube step by step, and create a fun new way for your listeners to enjoy your broadcasts!
Note: In order to be able to broadcast your radio on YouTube, you’ll need to verify your channel. YouTube will ask you to enter a phone number to identify you as the owner. The verification of your account takes 24 hours, so be sure to do it a few days before your live broadcast.
Setting up your live stream
Discover our step-by-step video tutorial here:
1. Download OBS
In order to broadcast your radio live on YouTube you will need to use the OBS software. If you remember, we already used this software to broadcast live on Periscope. It may seem complex at first, but OBS is a great ally when it comes to video transmission. The software is available on Mac, Windows and Linux.
Has your YouTube account been verified and have you downloaded OBS? Perfect, you are almost ready to broadcast your live show on YouTube.
2. Configure your radio stream with OBS
In order for YouTube to broadcast your live feed, you need to configure OBS with your listening link. To do so, open OBS and create a scene by clicking on + in the bottom left-hand corner.
In each scene you can add sources, this is where you can add video, images and of course your radio stream:
- Go to Sources and click on + > VLC Video Source
- Choose Create New
- In Playlist click + > Add Path/URL
- Paste the listening link of your station (found under the Share tab of your Radio Manager)
Once you have added your listening link, you can take care of what your listeners will see. If you want to activate your webcam choose Video Capture Device > Create New and in Device search for your webcam. You can also add images, text…let your imagination run wild!
3. What to do if VLC video source doesn’t appear?
If you are unable to add a VLC video source, it’s probably because you don’t have the correct version. To put it simply, if you have downloaded the 64-bit version of OBS, you will also need the 64-bit version of VLC. If you have downloaded the 32-bit version of OBS, you will also need the 32-bit version of VLC. You can download the version you need here:
- VLC 64-bit (Mac OS X)
- VLC 64-bit (Windows)
- VLC 32-bit (Windows)
Once you have downloaded the corresponding version of VLC, you’ll need to restart your computer. You should now be able to add a VLC video source to OBS.
4. Configure OBS
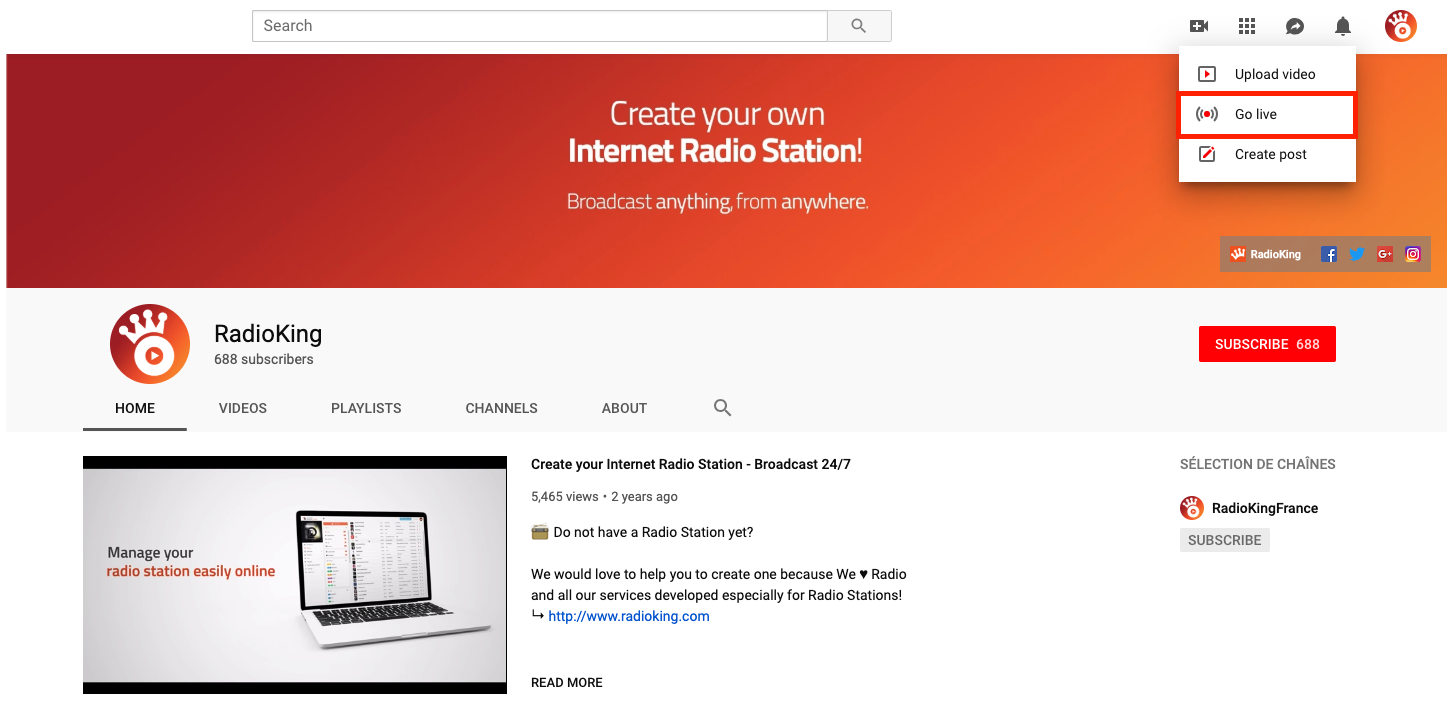
Now head over to YouTube to retrieve your live broadcast key and URL. Thanks to this information, you’ll be able to broadcast everything that comes from OBS directly onto YouTube. On your home page click on the camera and choose Go Live.
Once you’re on the live home page, click on Stream, give your show a name and click on New Stream (you can also choose a category for your show and even a cover image).
You’ll then have access to your Stream URL as well as a Stream Key (the part that we’ll need). Head back over to OBS and enter your stream key.
Click on Settings and go to the Stream tab. Under Service, select YouTube and enter your stream key.

You’re almost there, simply click on “ok” to save your information!
Are you ready? Click on Start Streaming on OBS then head back to YouTube. You’ll see a preview of your live broadcast. If you’re happy with what you see, then click on “Go Live“.

Your radio is now broadcasting live on YouTube. Would you like to speak live on air? It’s easy, simply open the live broadcasting software of your choice and do your show as usual.
CAREFUL: Bear in mind the live broadcasting delay that can be up to 1 minute for certain listeners.
You can share the link to your live broadcast by clicking on the arrow in the top right-hand corner.

Frequently Asked Questions
Are there any other platforms on which I can stream live?
Yes, you can also broadcast on platforms like Periscope! Follow our tutorial here.
Why stream my radio on YouTube live?
With over 122 million active users daily, it’s a great platform to offer your content. It also opens up opportunities for real-time interaction through YouTube’s live chat feature, which can boost listener engagement and community building.
What visual content should I use for my broadcast?
If you want to keep it simple, you can broadcast your radio show by streaming a still image or a static frame (like your station logo, album art, or a cool visual) while your audio plays in the background.
If you’re looking to create a more dynamic and engaging experience, you could also go live with actual video footage. This could be anything from behind-the-scenes shots of your studio, a live feed of your DJ mixing tracks, interviews with guests, or even live events and performances. Adding a visual element helps build a stronger connection with your audience, people love seeing the faces and stories behind the voices they listen to.