
We’re back with the last part of this series of articles on how to build your own radio studio! Today we’ll be showing you how we finished the preparations of the table and installed all of the technical equipment.
Let’s finish the table!
As you probably saw in Part 1, we drilled 5 holes in the table to insert the microphone arms. Once we tested it and checked that the arms fitted perfectly, we took them off in order to sand down the table to make sure that it was nice and smooth. We were then able to begin painting the first undercoat. We repeated this process (alternating between sanding and painting) 3 times.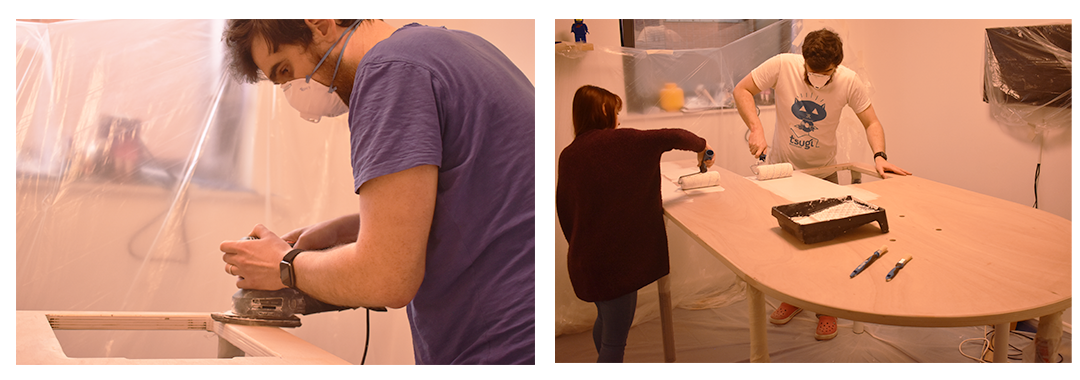
Building our rack
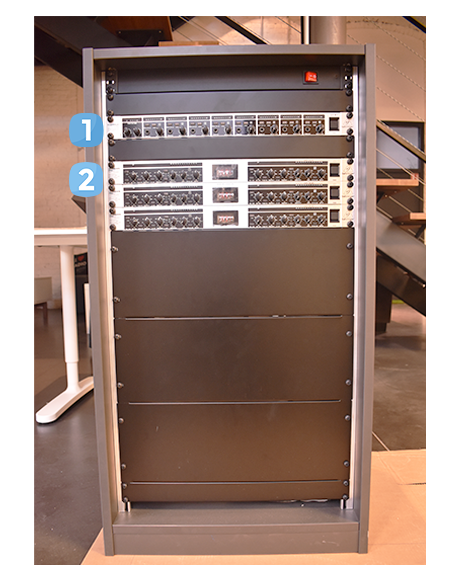 We also completed building our rack. You may be asking yourself what a rack is? Well, it’s a supporting framework that holds technical equipment. In our case, we’ll be using it to hold our headphone and microphone amplifiers. Racks make it possible to contain a lot of equipment in a small, secure space without requiring shelving. We’ll be placing the rack by the radio host so that they have easy access to the equipment.
The top part of the rack (1) corresponds to our headphones amplifier. The bottom of the rack (2) corresponds to our microphone amplifier.
Now that the table has been sanded and covered in an undercoat, we moved onto painting it with our grey resin finish. Bearing in mind that it takes around 6 hours to dry properly, we did the first coat in the morning and then a second coat at the end of the day.

Acoustic treatment
While we waited for our table to dry, we began working on the acoustic treatment of the room. Teddy, our studio expert, analysed the room and decided that we’d need to put some acoustic mousse on the walls to help absorb the reverb. We simply used a special glue, adapted for this purpose, to put it up on the wall.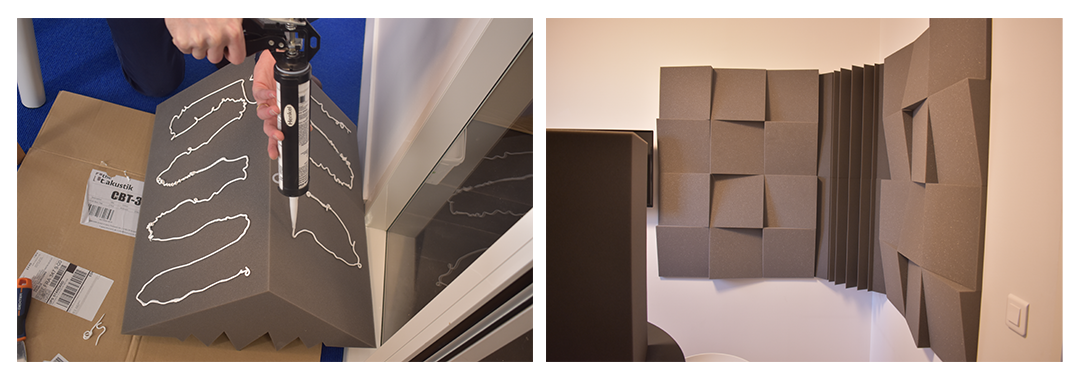
Connecting our equipment
Now that our resin finish is dry, we added a final finishing coat on the table for protection. We can now permanently install the table in our studio. We decided to attach our table directly to the wall, with the rack underneath (placed by the host’s chair) which will also help support the table.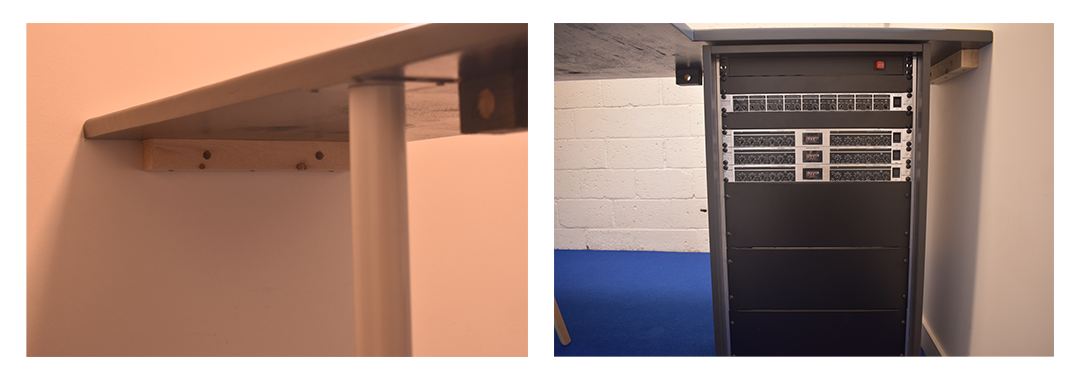
 Now that our table is finished and put in place, it’s time to put all of the technical equipment in the studio! This includes the microphones, microphone arms, the headphones as well as all the necessary cables to connect our equipment to the amplifiers in the rack and our mixing desk.
Here’s a reminder of our technical set up that we explained in Part 1.
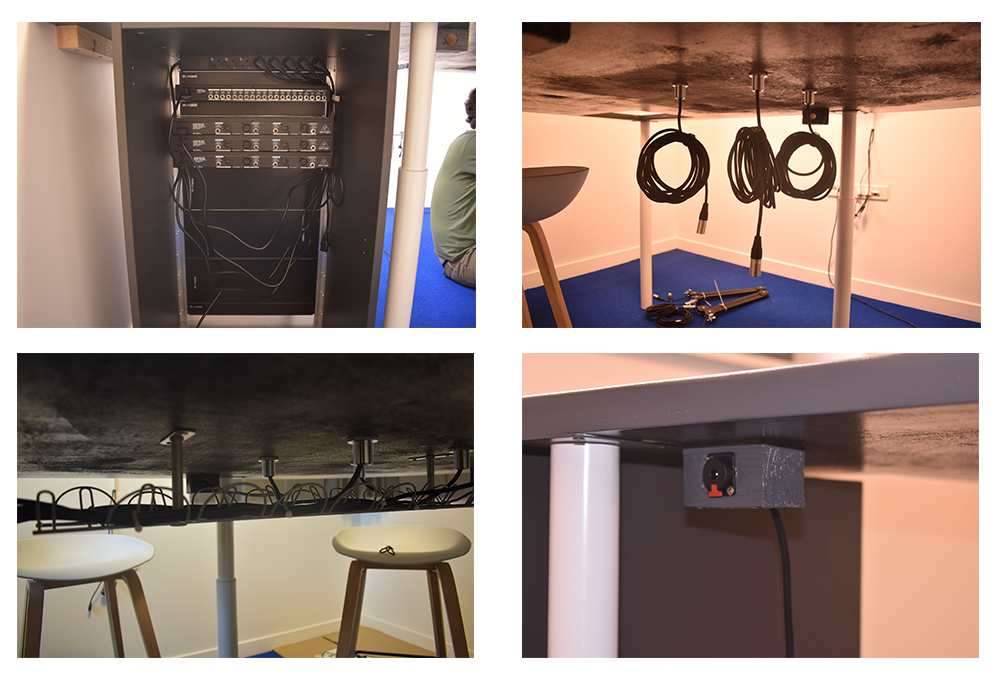 The headphones and microphones are connected to the amplifiers in the technical rack. The cables from our microphones come through the center of the table and are attached underneath the table to avoid having cables hanging loosely. Our headphone cables were passed through the wooden blocks we created earlier.
Now, the moment you’ve all been waiting for! Here is what our new home-made radio studio looks like! 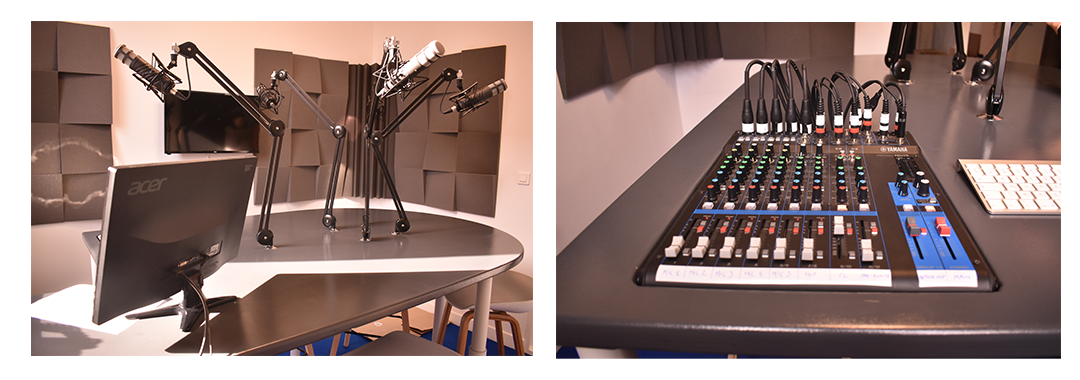 Thanks so much for coming on this journey with us. Tell us what you think of our studio in the comments below! We’re working on a video presentation of the studio that we’ll share with you soon! ?
