
Using Facebook Ads is one of the easiest ways to promote your very own radio station and increase its visibility! With a user-friendly process and a wide range of customizable options, you can create an ad campaign on a small budget in just a few clicks.
⚠️ In order to create Facebook Ads, you must have a Facebook Business Page.
What are Facebook Ads?
There are 12 different types of Facebook Ads that you can create. To simplify, here are the 3 most popular types if you’re planning on creating your first campaign:
- Image Ads: create a simple ad with an image.
- Video Ads: create your own videos with filmed footage, GIFs or animations and promote them. Consider using a video ad maker to simplify the process and create professional-looking videos.
- Dynamics Ads: allows you to promote products specifically to the people who are most likely to be interested in them.
To find out more about the different types of Facebooks Ads you can create, follow this link.
How to create Facebook Ads?
To start the creation of your ads, head over to the Facebook Ads Manager or Business Manager. In this article, we’ll be using the Facebook Ads Manager. If you want to use the Business Manager, we invite you to take follow these steps.
1/ Choose an objective and name your campaign
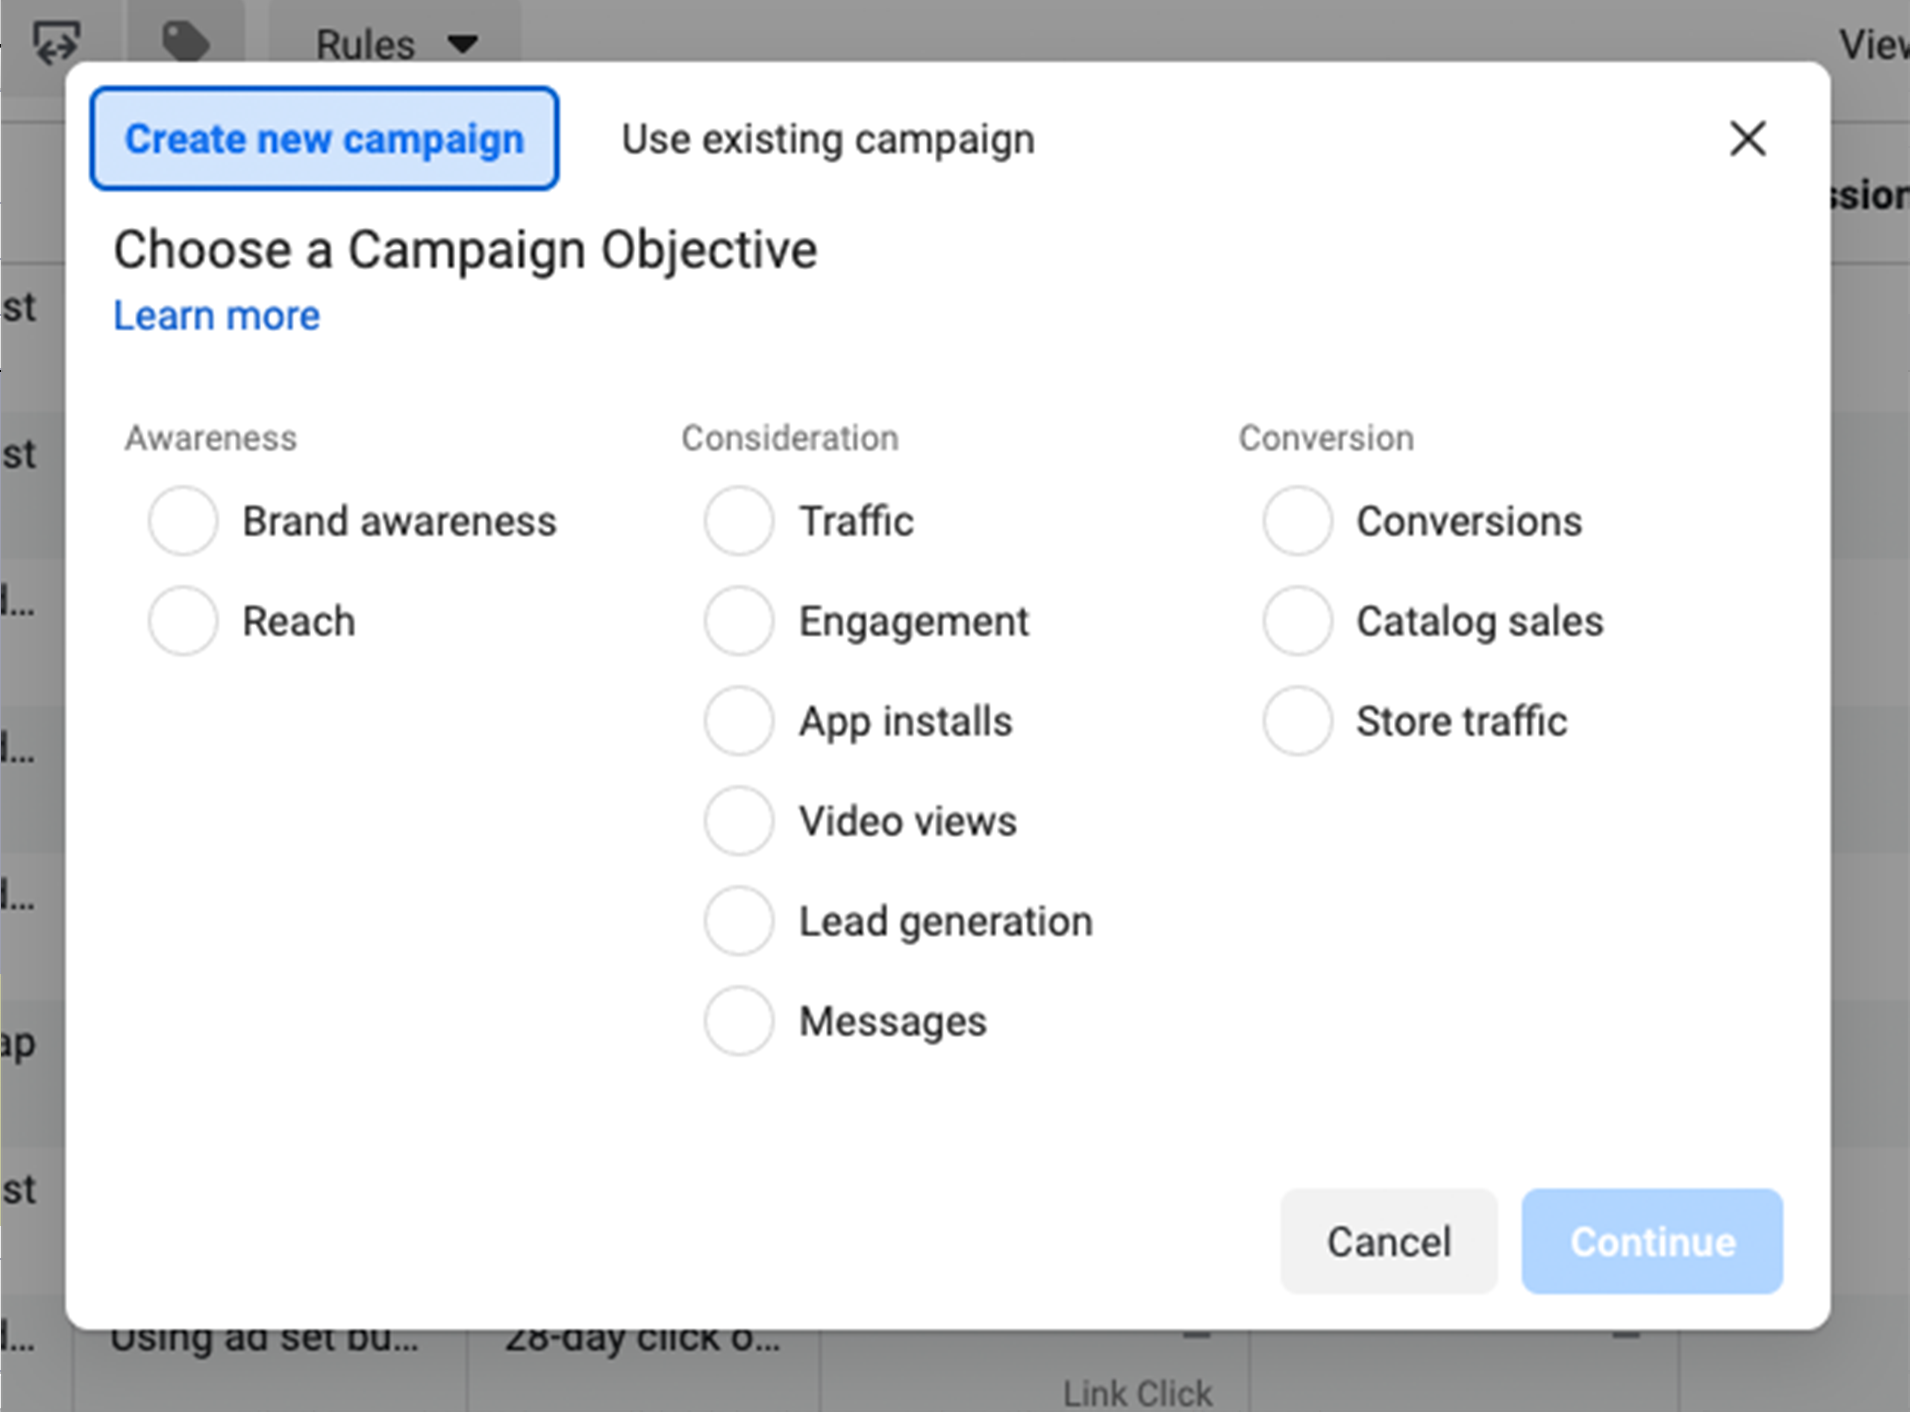
Once you’ve logged into your Facebook Ads Manager, go to the Campaigns tab > Create in order to start a new Facebook ads campaign. Facebook offers 11 different objectives depending on what you’re seeking to accomplish with your campaign. You can view them all in the toggle-list below:
Full List 👇
2. Reach: Exposes your ad to as many people in your audience as possible.
3. Traffic Drives traffic to a specific web page, app, or Facebook Messenger conversation.
4. Engagement: Reaches a wide audience to increase the number of post engagements.
5. App Installs: Gets people to install your app.
6. Video Views: Gets more people to watch your videos.
7. Lead Generation: Gets new prospects into your sales funnel.
8. Messages: Encourages people to contact your business using Facebook Messenger.
9. Conversions: Gets people to take a specific action on your website, your app, or Facebook Messenger.
10. Catalog Sales: Connects your Facebook ads to your product catalog.
11. Store Traffic: Drives nearby customers to your stores.
Be sure to keep your goals in mind when selecting the objective of your campaign. You’ll have pay per action for conversion-oriented objectives (sales), and you’ll pay for impressions if you choose an exposure objective (traffic and views).
Let’s say that we want to increase the number of people who “like” our Facebook page, in this case we’ll choose Engagement > Page Likes:
Note: please bear in mind that the options on your screen may vary from our tutorial depending on the options you select.
Click on Continue, then give your campaign a name.
2/ Set a budget and schedule your Facebook Ads
You can launch a campaign on any budget, there’s no minimum requirement! In this step, you’ll need set your advertising budget which corresponds to the total amount that you want to spend daily or over the course of the campaign (lifetime).
If you want to schedule your ad for later in the future, select the start and end dates. Otherwise, you can choose to submit it straight away.
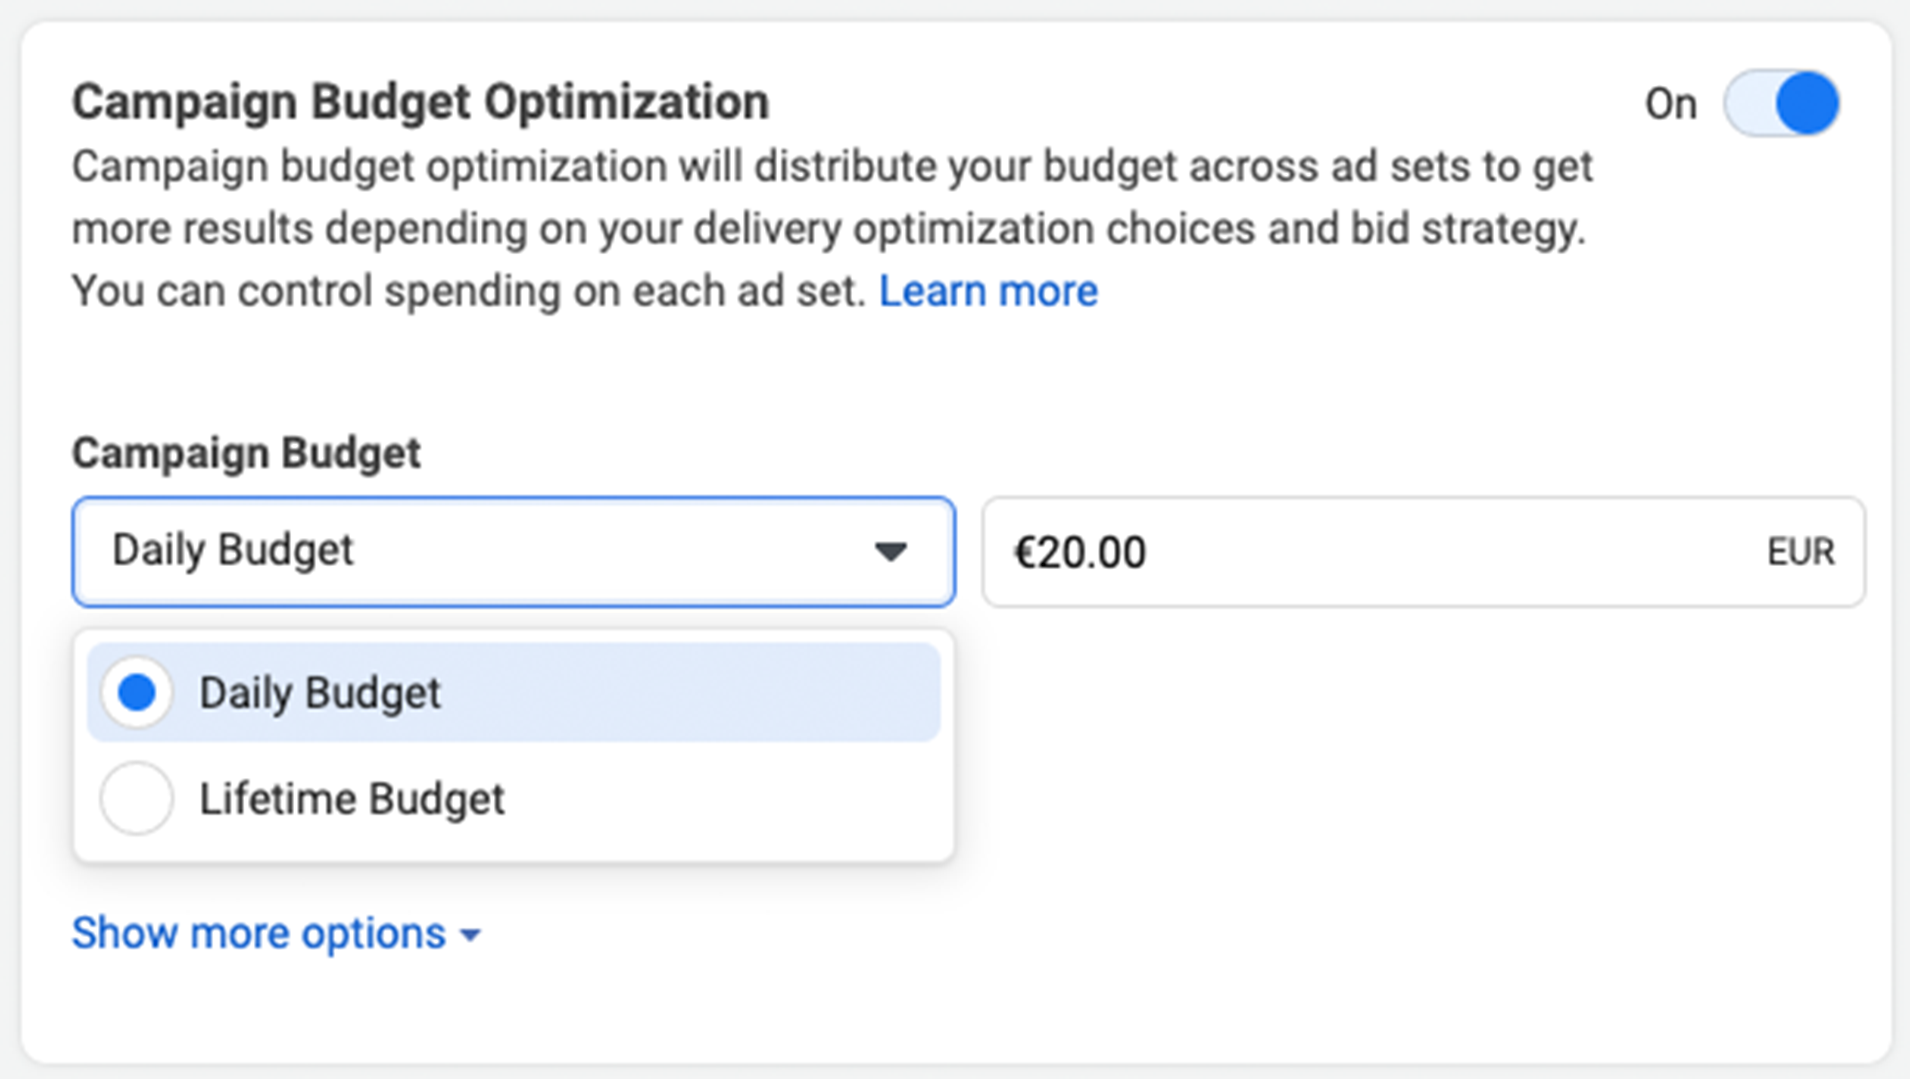
Note: You only have the possibility of scheduling your campaign if you create a lifetime budget for your ad.
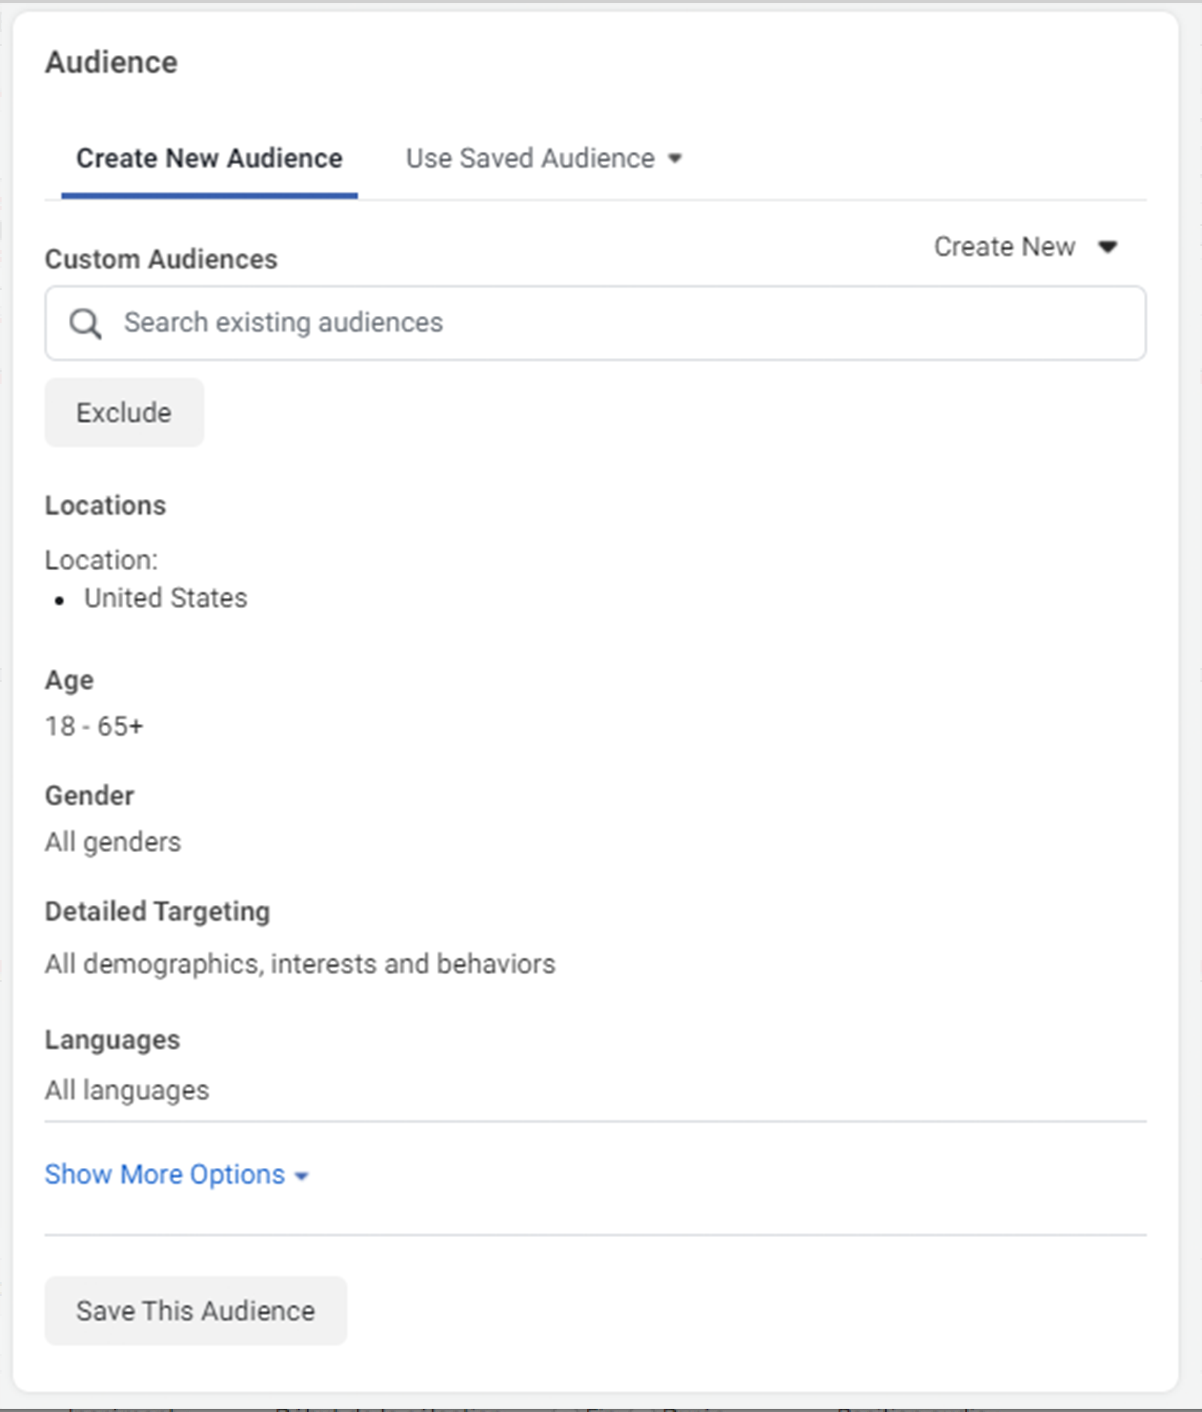
3/ Target your audience
It’s now time to decide who your Facebook Ads are aimed at. There are 3 types of audiences:
- Custom Audience: Connects with people who have already shown an interest in your business or product.
- Lookalike Audience: Reaches new people who are similar to audiences you already care about.
- Special Ad Audience: Specifically designed to reach people when your campaign is about Credit, Employment or Housing.
Next, you’ll need to select your target location, age, gender and language.
Note: as you make your choices, be sure to regularly check the audience size indicator on the right-hand side of your screen. It will give you an idea of your potential ad reach, but don’t forget that these are estimates, not guarantees.
Once you have set up those options, it’s time to look at Detailed Targeting. Here, you’ll have 2 fields to help you make your audience as specific as you want:
- Detailed targeting: allows you to (really) specifically include or exclude people based on demographics, interests, and behaviours.
- Connections: allows you to target (or exclude) people who have an existing connection to your Facebook Page, your app or an event you’ve previously managed.
4/ Choose placements
It’s now time to choose where your Facebook Ads will appear to your target audience. The options that appear before you may vary according to your chosen objective. Here’s an example of the options you may see:
- Device type: Mobile, desktop, or both.
- Platform: Facebook, Instagram, Audience Network and/or Messenger
- Placements: Feeds, Stories, in-stream (for videos), search, messages, in-article, and apps and sites (external to Facebook).
- Specific mobile devices and operating systems: iOS, Android, feature phones or all devices.
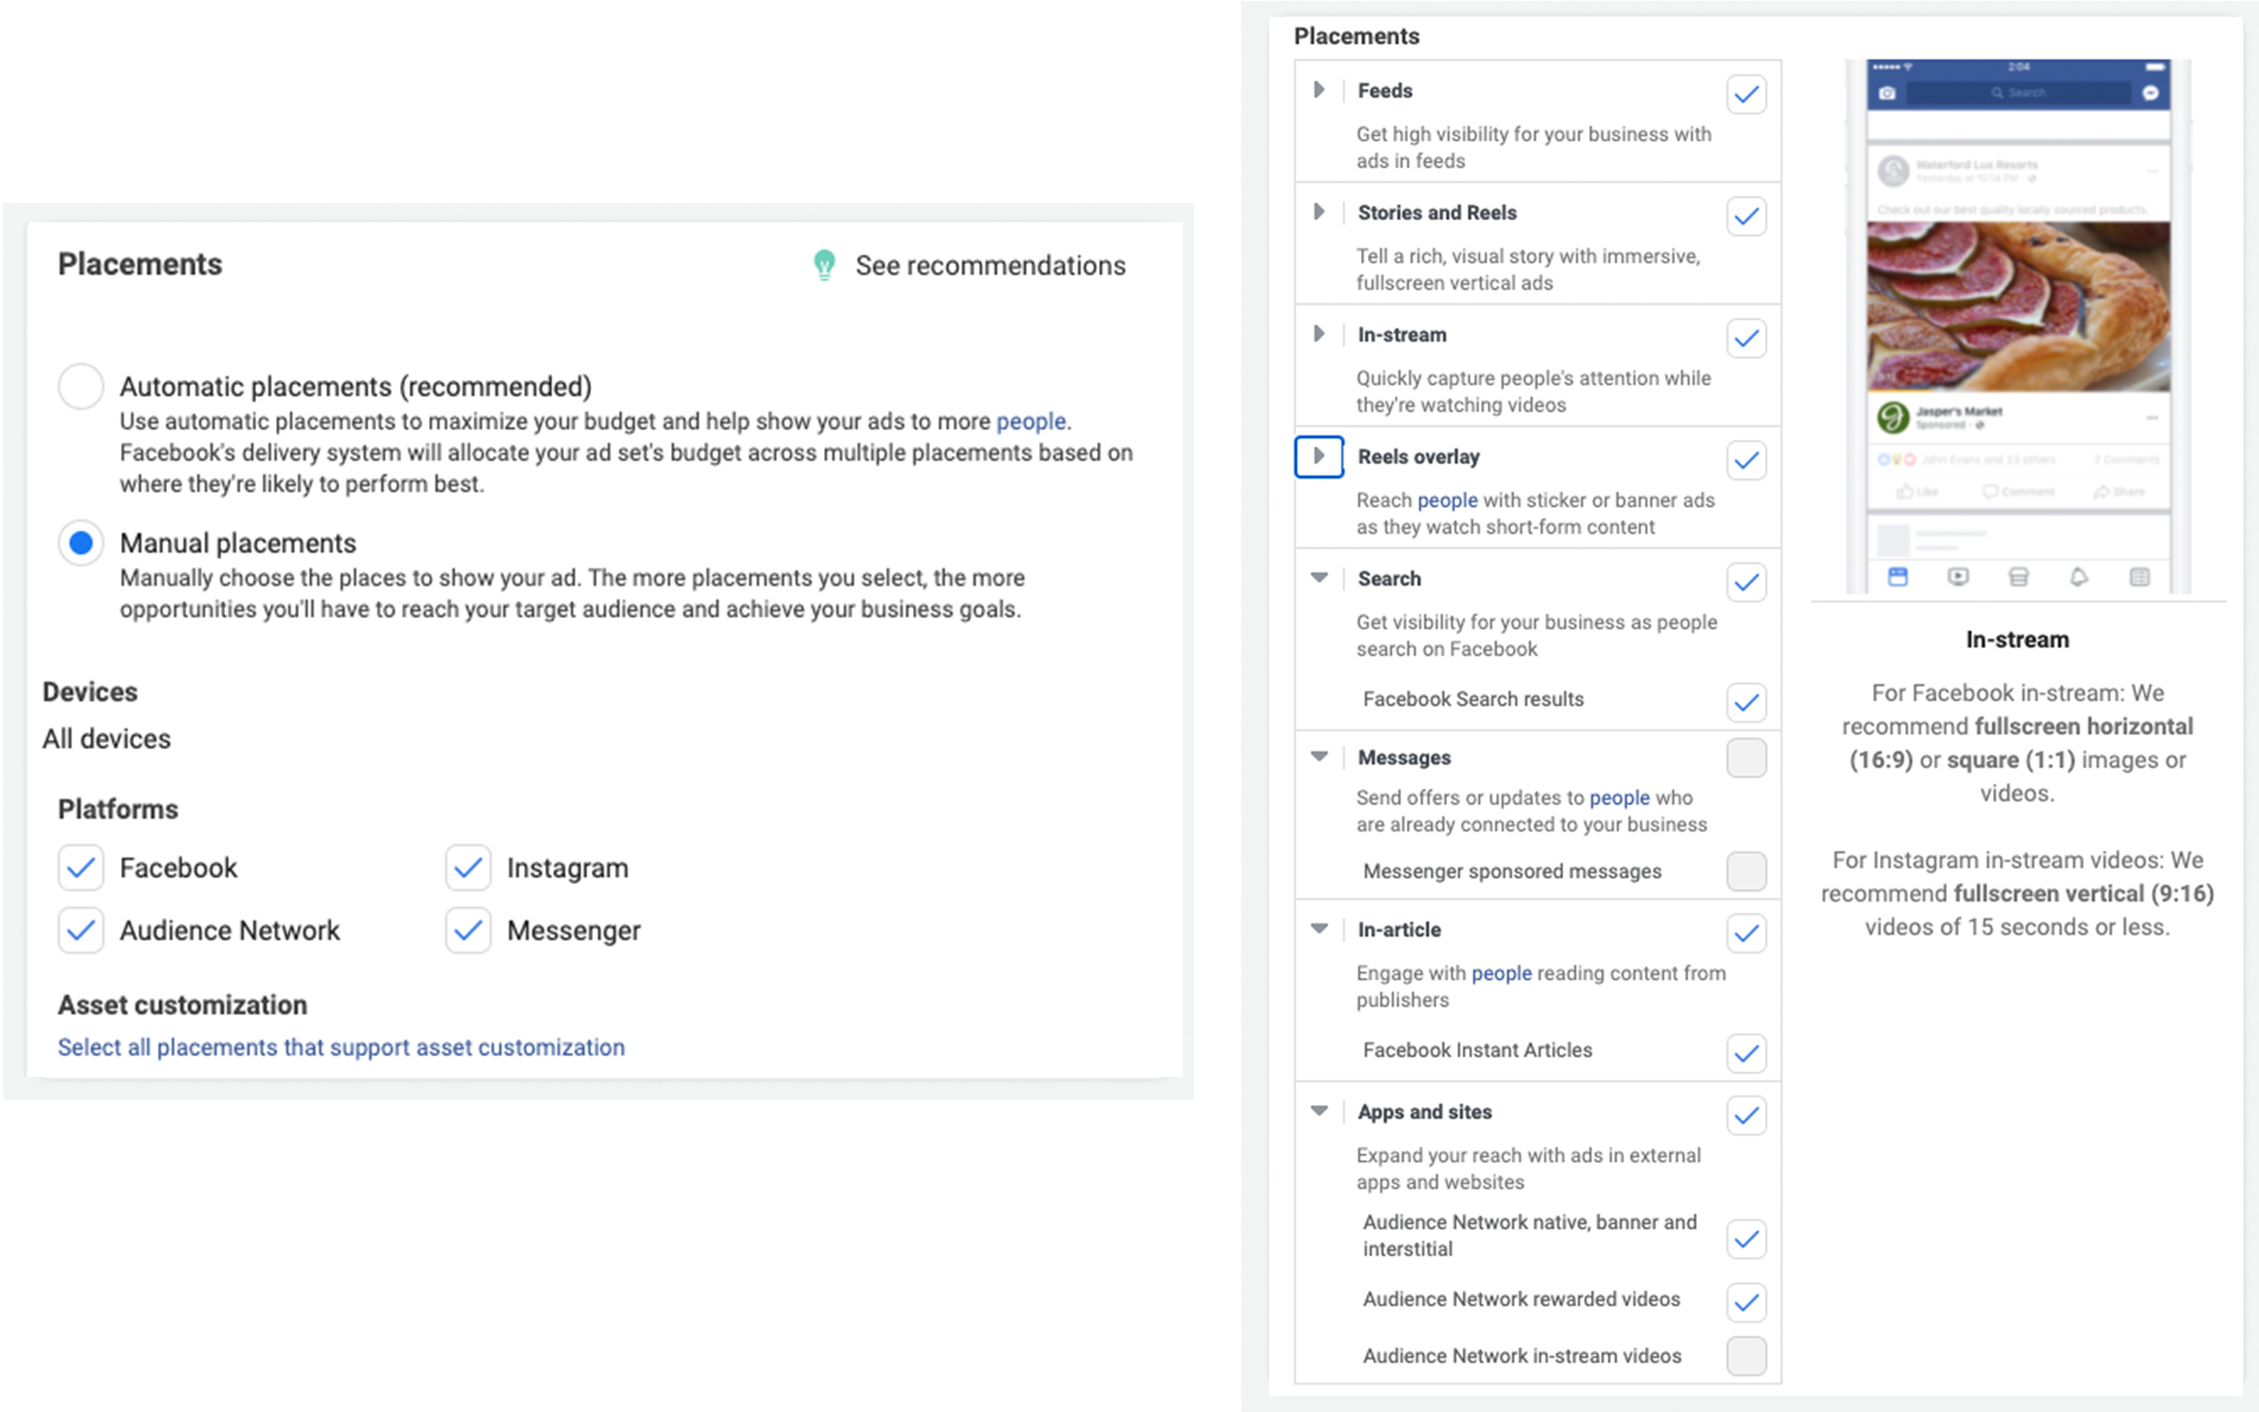
Top Tip: If you’re new to Facebook Ads and find this step a little overwhelming, you can select the Automatic Placements option.
5/ Set brand safety and cost controls
This section allows you to exclude any type of content that you feel would be inappropriate to appear with your ad. For example, you can choose to add specific block lists in order to exclude specific websites, videos, and publishers.
Here you’ll also be able to optimize your bidding type and bidding strategy. If you’re new to Facebook advertising, we advise that you launch your first campaign with the default options. If you’re comfortable with Facebook Ads, you can customize the available options to best match your budget strategy with your campaign goals.
Don’t forget to check the potential reach and conversion estimates before moving on to the next step!
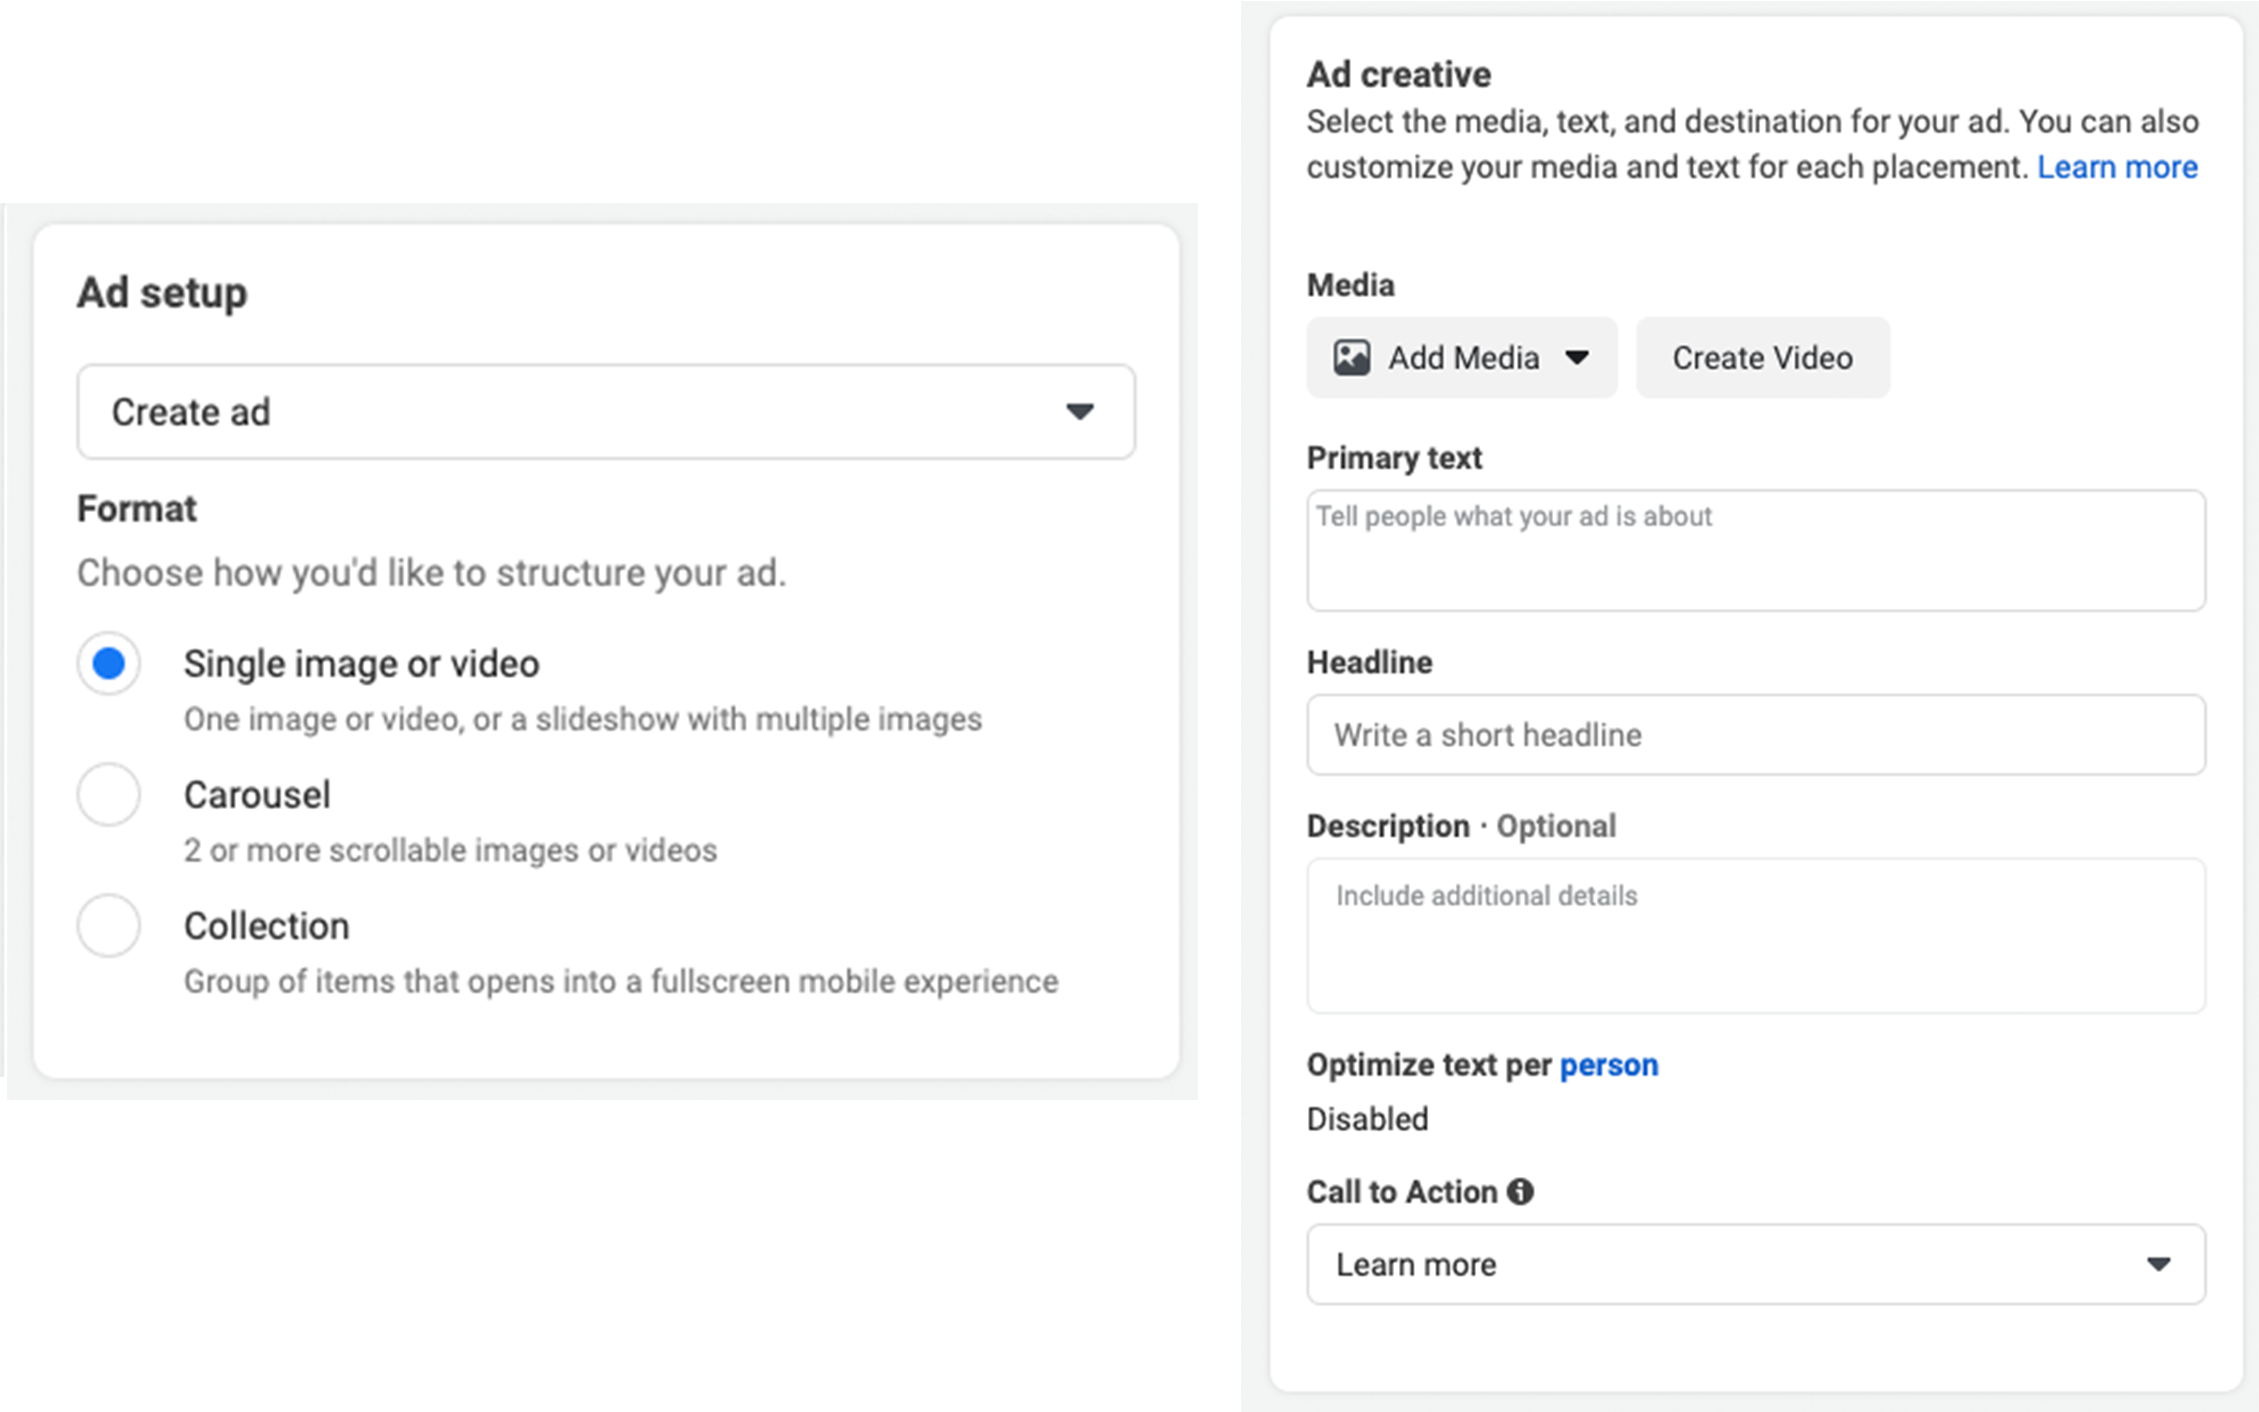
6/ Create your Facebook Ads!
The final step: create your Facebook Ad! You’ll need to start by choosing your ad format. Then, enter the text and upload any media components you want to include.
Note: The ad formats available to you may vary based on the campaign objective you selected earlier.
Here’s where you can really have fun with the process! If you uploaded with an image, why not create a short animation using the Turn into video feature? There’s also a Create Slideshow feature that easily allows you to make a slideshow ad with Facebook’s online tools.
You’ll find a preview tool in the top-right hand corner, so you can check that your ad looks like it’s supposed to and everything is in its place. When you’re happy with your Facebook Ad, click on the green Publish button to set it live!
Checking the statistics of your Facebook Ads
To view the results of your campaign, simply head over to your Ads Manager and select Campaigns > Ad Sets > View Charts. Here, you’ll see all the statistics regarding your ads, such as:
- Performance: shows the number of people who click on your ad, the number of people you reach and the overall cost of your ad.
- Demographics: shows how your ad performs across different ages and genders.
- Placement: shows your ad’s performance across different placements, such as Facebook or Instagram.
- Delivery: shows the predicted and delivered value for reach, impressions, as well as the total amount spent.
We hope that you found this article helpful! If you’re just starting out with Facebook Ads, we suggest that you launch your first campaigns with a small budget, and default settings. Once you’re more comfortable, you can play around with the various settings and objectives in your next ads!

