Created to bring gamer communities together, Discord has quickly become a must-have messaging software, yet the platform can also be useful for radio hosts! Here’s how to put your listeners on air or simply carry out a live broadcast on your Internet radio station with Discord.
1. What you’ll need
2. Configure Discord
3. Setting up your virtual mixers
4. Live broadcasting software
Note: This setup is possible with both Windows and MacOS, however, the configuration steps will differ slightly. We’ve included the necessary information for both operating systems below!
What you’ll need
In order to broadcast live on air with multiple guests, you will need to use various software and extensions. They will allow you to speak with your radio guests and send the audio from your conversation to your live radio stream. To get started, you will need:
- Discord in order to invite and interact with your listeners or guests.
- A virtual mixer
– For Windows: VoiceMeeter
– For MacOS: Loopback (or SoundFlower) - A live broadcasting software to broadcast live on your radio station.
Configure Discord
As explained above, Discord is the platform on which you will communicate with your guests. It’s completely free and incredibly easy to use.
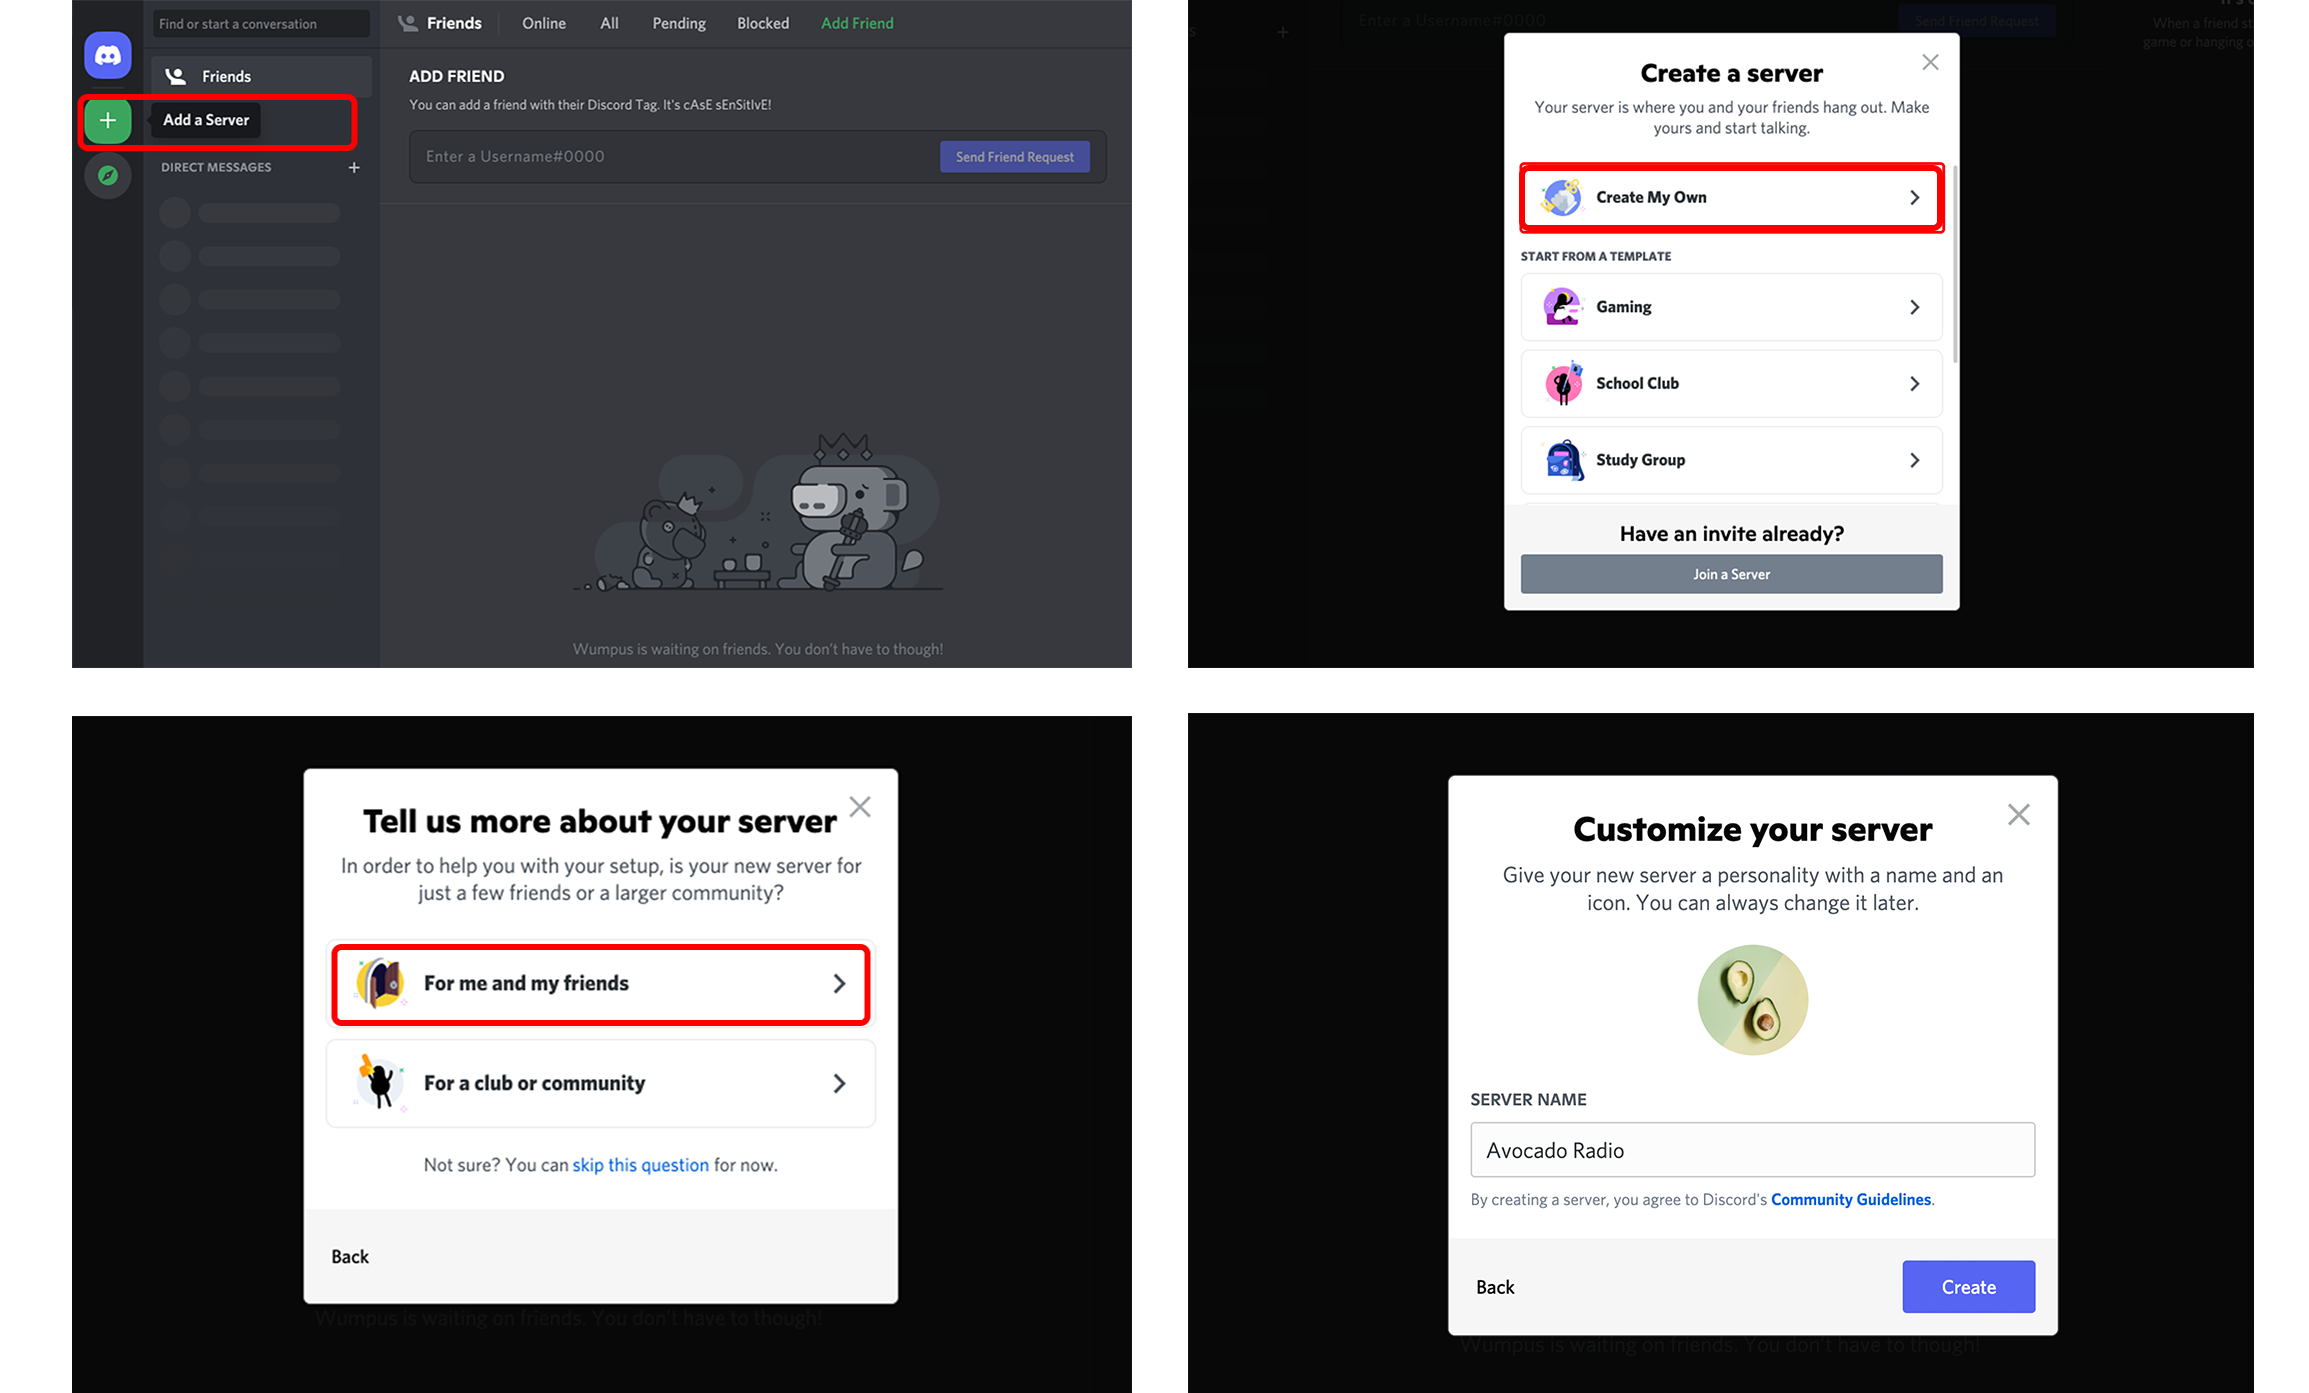
To get started, open Discord and create a (free) server on behalf of your radio station. Think of this server as a kind of chat room where you’ll later be able to invite your guests in order to exchange with them.
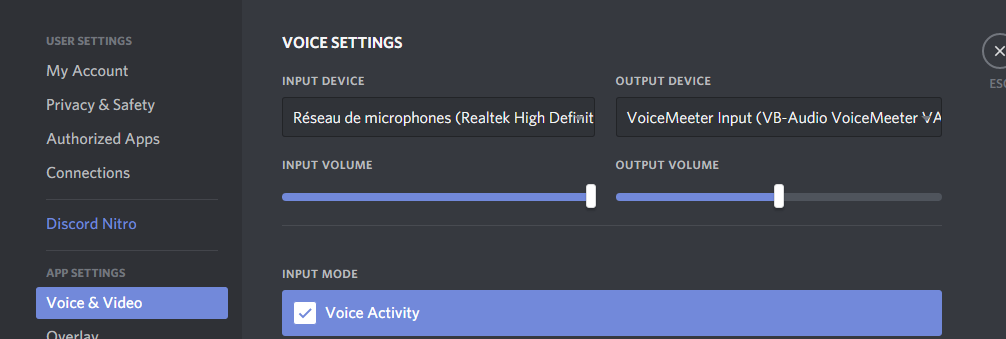
Once you have created your server, head over to the Voice & Video settings by clicking on the gear icon on the bottom-left of your screen. Here, you’ll be able to select your preferred input and output devices.
For Mac users:
- Input Device: select your microphone
- Output Device: select Loopback Input (or SoundFlower)
For Windows users:
- Input Device: select your microphone
- Output Device: select VoiceMeeter Input
Remember: When you’re ready to go live, you’ll need to head back to Discord under Voice Channels to invite and speak to your guests. Click on Create an invitation and enter the discord username of your guest, or send them the invitation link so that they can join your server directly.
Setting up your Virtual Mixers
VoiceMeeter configuration (for Windows users)
Mac users, click here to move directly onto the next step.
If you’re a Windows user, you’ll need to download 2 smaller software types for VoiceMeeter before making your adjustments: VB-Cable & HIFI-CABLE & ASIO-Bridge.
Once downloaded, you’ll need to install them by unzipping both files and clicking on install. When you have installed VB-Cable and HIFI-CABLE & ASIO-Bridge, you’re finally ready to open VoiceMeeter.
This is what the Voicemeeter interface looks like, we’re now going to look at how to configure your input and output sources.
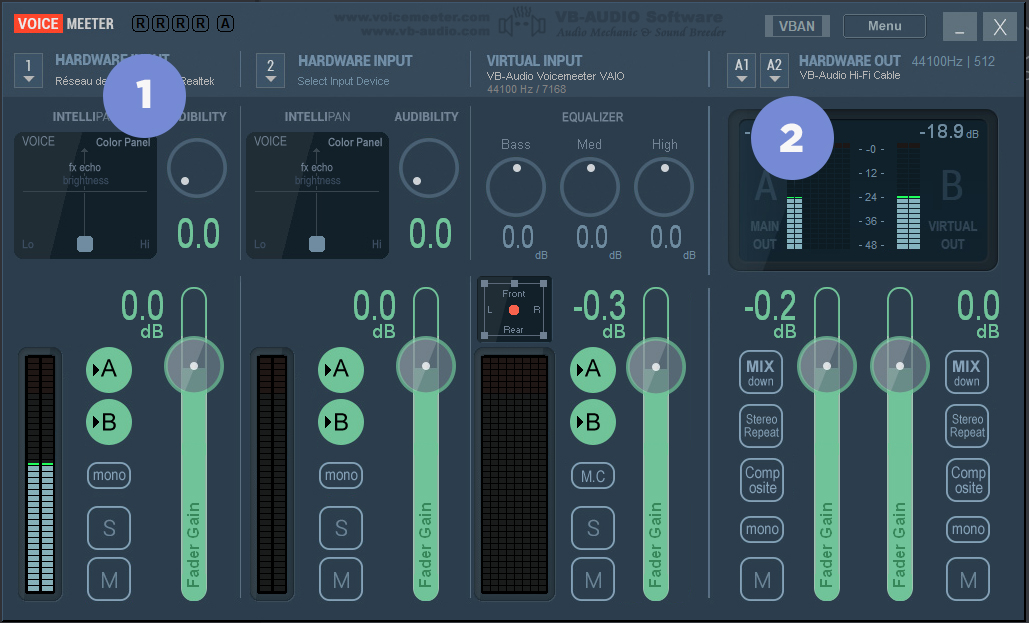
In Hardware Input (1) select your microphone input.
In Hardware Out A1 (2), select KS: VB- Audio Hi-fi Cable.
The Virtual Input represents the sound coming from Discord. Bear in mind that you can lower or increase the Fader according to the volume you want.
Loopback configuration (for Mac users)
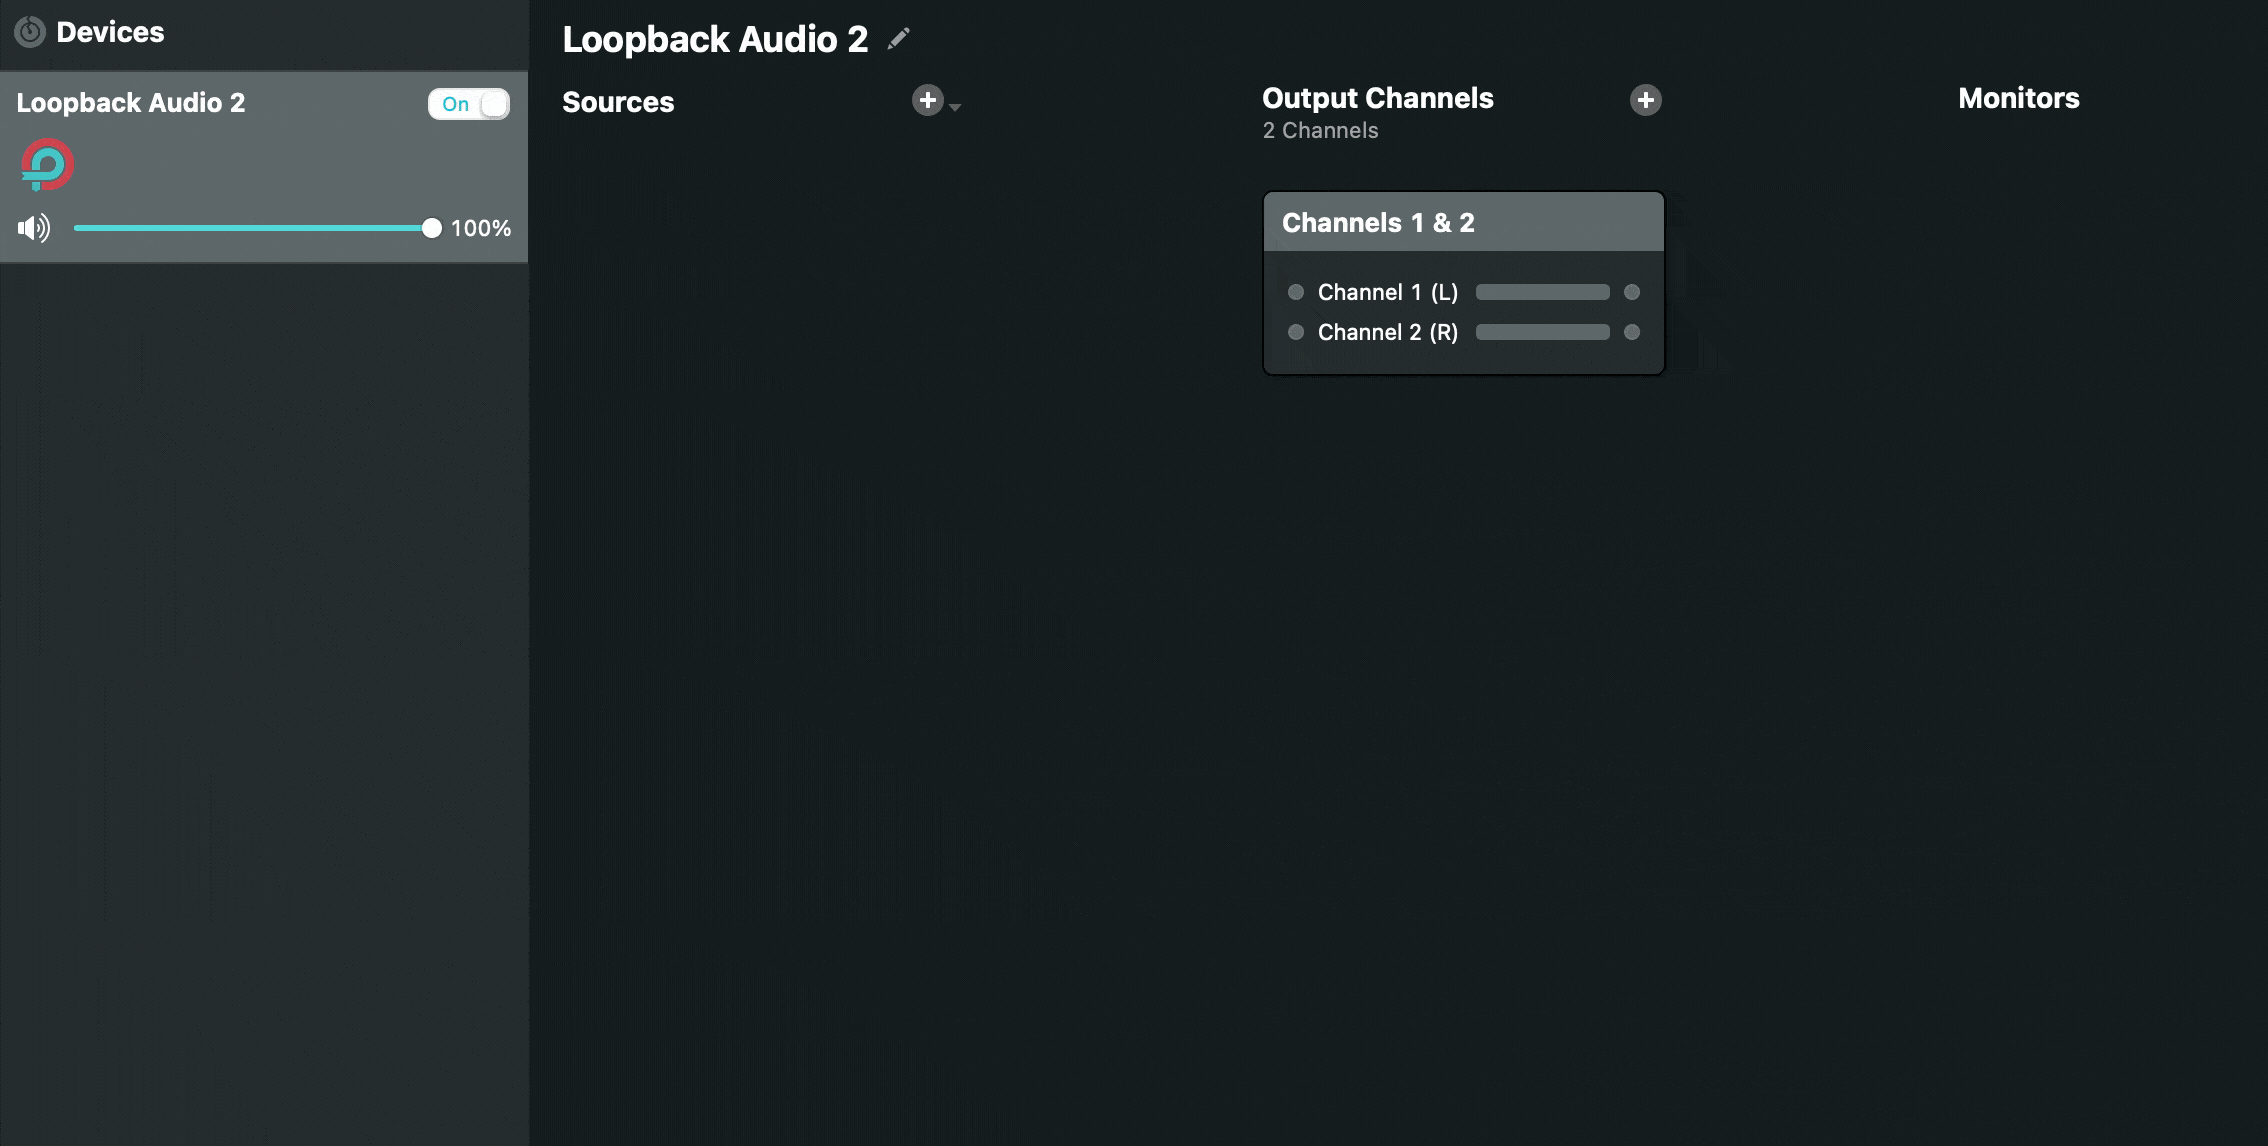
If you’re a Mac user, you’ll need to open Loopback and add 2 different sources: Discord and your microphone. To do so, simply click on the + button next to “sources” and select the elements directly in the list. but Don’t forget to uncheck the “Mute when capturing” option for Discord to make sure the sound goes through.
Note: the free trial version of Loopback allows you to use the service for 20 minutes before the audio quality decreases. You can purchase the full version here.
Live Broadcasting Software
The live broadcasting software will allow you to send your audio through to your radio stream and make it available to your listeners. The choice of the software is completely up to you, there are a number of great options available for both Windows and MacOS. Once you have chosen your software, easily configure your radio stream by entering the live connection information that can be found under the Live Tab of your Radio Manager.
Before you launch your live broadcast, you’re going to need to make a couple of adjustments. Head over to the Audio Input/Output field of your chosen software.
In the Input Device field:
- For Windows, select HI-FI Cable Output
- For Mac, select Loopback
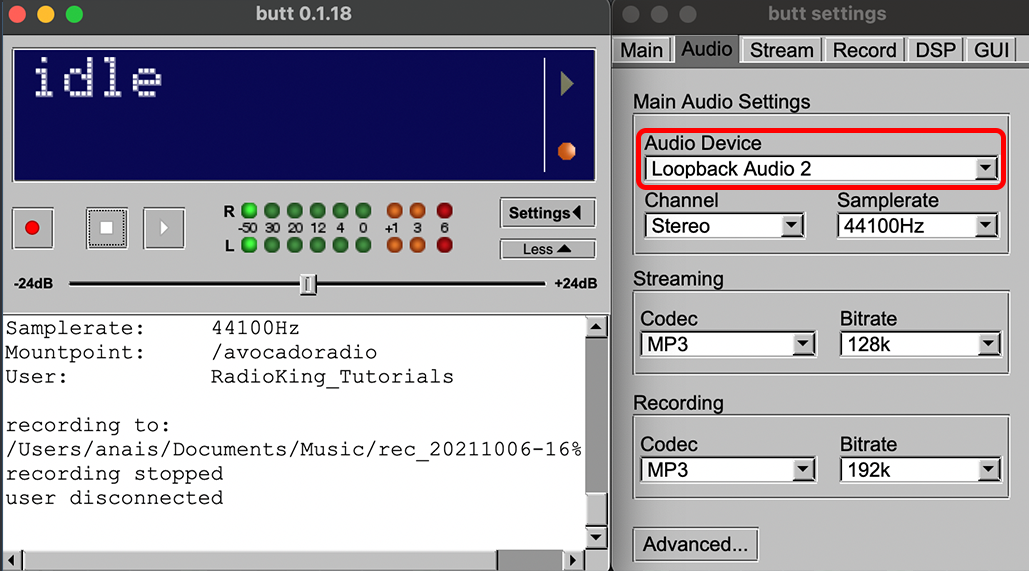
Here’s an example of the input settings in BUTT for Mac users:
All your settings are now complete! You can now launch your live broadcast via your live broadcasting software, head back to your Discord server and begin speaking with your guests! The audio from Discord will go through your virtual mixer (Loopback or Voicemeeter) which, in turn, will be the audio input for your live broadcasting software.
Now all that’s left to do is to go live on your radio station with your guests. Happy broadcasting!